

Evaluating Space and Placement Options
Choosing the right place for our heat pump makes a big difference in how well it works, how long it lasts, and how easy it is to take care of. We need to look at the best spots for both the indoor and outdoor units, the space we need around each part, and how air can move through the system.
Assessing Indoor and Outdoor Unit Locations
We start by picking the best locations for our heat pump’s indoor and outdoor units. For the indoor unit, we look for a central spot in the main living area to help spread the heated or cooled air evenly. Placing it away from doors, windows, and direct sunlight also prevents temperature swings.
For the outdoor unit, we choose a sturdy, level surface outside like a concrete pad. We put it somewhere with good drainage and far from plants or anything that could block air. Close placement to the indoor unit is best, as it reduces the length of pipes and wiring, which helps performance and saves money.
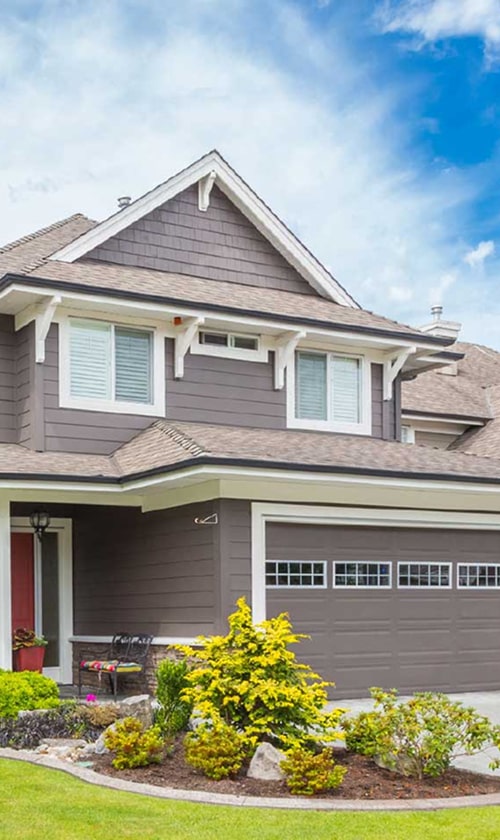
A list of common placement options:
- Indoor: Living rooms, hallways (away from doors/windows)
- Outdoor: Backyard side walls, flat roofs, dedicated ground pads
Meeting Space Requirements and Clearance Needs
Every heat pump has specific space requirements to work correctly. We need to leave enough room around both the indoor and outdoor units for air to travel and so that maintenance workers can get in when repairs are needed. This clearance is usually listed in the installation manual, but as a rule, outdoor units often need at least 12-24 inches on all sides.
Not providing enough clearance can lead to poor air flow, more noise, and higher chance of breakdowns. For safe installation, we avoid placing the outdoor heat pump unit under low decks or close to fences and walls, since this can block air. For our indoor unit, we keep it at least 6 inches from ceilings and avoid putting furniture right in front of it.
| Heat Pump Part | Minimum Clearance |
|---|---|
| Indoor Unit | 6″ from ceiling |
| Outdoor Unit Rear | 12-24″ from walls/fences |
| Outdoor Unit Sides | 12-24″ from objects |
| Outdoor Unit Front | 24-36″ clear for airflow |
Considering Airflow and Air Circulation
Strong airflow is key for a heat pump to work right. We make sure there are no obstacles blocking the intake or outflow of air from either unit. For the indoor part, we leave the space around it open. This lets air move freely and helps the heat pump heat or cool rooms more evenly.
The outdoor unit needs to be free from bushes, stored items, or snow in winter. Poor air circulation around the outdoor unit can make it less efficient and could make the system overheat or freeze up in cold weather.
For best results, we check and keep all vents, grilles, and louvers clean and free of dust and debris. If we are not sure about airflow requirements, we check the manufacturer’s guidelines or ask a heat pump installer to look over our placement.
Maximizing Efficiency and Performance

Proper placement of a heat pump leads to better energy use, lower bills, and stronger comfort at home. We need to focus on heat transfer, keep energy use down, and consider how sun and shade affect heating and cooling.
Ensuring Optimal Heat Transfer
To get the best heat transfer, we must install the indoor unit where air can move freely. Placing the unit too close to walls, behind furniture, or in tight corners blocks air flow and reduces efficiency.
Key tips:
- Set the unit at least 6 inches away from the ceiling.
- Keep a 12-inch clearance on each side.
- Avoid placing the unit above electrical devices that generate heat, like TVs or ovens.
For the outdoor unit, airflow matters too. We should place it on a sturdy base with no plants, fences, or clutter around it. This ensures better heat exchange and keeps performance high, especially in extreme temperatures.
Reducing Energy Costs and Improving Comfort
Where we install the heat pump can make a big difference in our monthly energy costs. If we put it where cool or warm air spreads evenly, we won’t have hot or cold spots in our home. This helps the system use less energy and work less often.
To save more on energy bills, we must keep the unit away from drafty areas and direct sunlight. Drafts can force the heat pump to run longer, while strong sun on the indoor unit makes it harder to control the room temperature.
Best practice:
- Place the unit in a central spot to reach many rooms.
- Install in a room we use often, like the living room or main hall.
- Seal windows and doors to keep conditioned air inside.
This setup offers a steady, comfortable temperature and better energy efficiency.
Accounting for Windows, Doors, and Sun Exposure
Windows and doors let light and outside air into the room, which can affect how well our heat pump works. If we install the indoor unit near windows or doors, we risk losing heated or cooled air, which lowers performance.
Direct sun on the indoor unit or space adds extra heat, making it work harder in the summer. Shading windows or using curtains helps stop this problem. For the outdoor unit, shady spots are best, but we must still keep clear airflow.
Checklist:
- Avoid pointing the unit directly at windows and doors.
- Use window coverings in sunny rooms.
- Place the outdoor unit near a north or east wall for less sun exposure.
Paying attention to these areas helps us get the most from our heat pump and keeps our home more comfortable.
Addressing Environmental and Outdoor Considerations

When installing an outdoor heat pump, we need to think about how the location will affect performance and durability. Protecting the unit from bad weather, managing debris and moisture, and keeping noise and appearance in mind helps ensure the system works well for many years.
Protecting from Weather and Environmental Hazards
Outdoor heat pumps need protection from harsh weather. Wind direction is important because strong gusts can blow debris into the unit or decrease efficiency. We should avoid placing the unit in areas where winds are strongest, like corners of buildings or open spaces with no barriers.
Sun exposure also affects performance. If possible, we should choose a spot with shade during the hottest part of the day to prevent overheating. However, some sunlight is okay, especially if the area is not overly humid. Avoid positioning the unit where it could get buried by snow drifts or blocked by overhanging branches.
Placing the unit on a strong, level platform can lift it above puddles formed during heavy rain or snow. Concrete pads or metal brackets work well and keep the unit away from standing water and soil, which can cause rust and damage.
Managing Debris, Rain, and Snow
Debris like leaves, grass, and dirt can collect around the unit, clogging vents and lowering efficiency. We should install the heat pump away from trees that drop heavy leaves or needles and keep the surrounding area tidy.
Rain and snow are both risks. The unit should have enough clearance—usually at least 18-24 inches from the ground—so water doesn’t pool around it. In snowy regions, this extra height keeps the unit above typical snowlines.
Here’s a quick checklist for preventing debris and moisture issues:
| Potential Hazard | Action |
|---|---|
| Leaves, dirt, or grass | Clear area regularly, use screens if needed |
| Heavy rain | Mount unit above ground, check drainage around base |
| Snow accumulation | Raise unit, avoid place where snow falls from roof or eaves |
Controlling Noise Levels and Aesthetics
Outdoor heat pumps can make noise, which may bother us or neighbors if installed too close to windows, patios, or other living spaces. We should pick a location that’s not directly under bedroom windows or outdoor areas where we relax.
Shrubs or fences help block noise, but we must leave enough space (at least 24 inches) around the unit for airflow and servicing. Proper spacing also prevents vibrations from traveling through walls, which can amplify noise indoors.
Aesthetics are also important. We can use landscaping, such as low bushes or decorative panels, to hide the heat pump without blocking ventilation. Neutral colors for covers or screens help the unit blend in, making the installation less noticeable in our outdoor space.
Ensuring Maintenance Accessibility and Longevity
A well-installed heat pump should be easy to reach for regular maintenance. Proper planning helps prevent issues, makes servicing simpler, and helps the system last many years.
Planning for Easy Maintenance Access
When we choose a spot for our heat pump, we need to leave enough room on all sides. This includes clear space for filter changes, cleaning, checking electrical parts, and inspecting the fan or coils. The area should not be blocked by shelves, walls, or other heavy items.
Placing the heat pump in a utility room is smart if the room has good airflow and easy door access. If the unit is outdoors, it’s important to keep it away from thick bushes, fences, or tall grass. We also want it off the ground to prevent dirt and water damage.
A good rule is to allow at least 24 inches of clear space on all accessible sides. Before installation, mapping out space for tools and occasional parts replacement keeps maintenance quick and safe.
Following Manufacturer’s Instructions
Manufacturers provide specific requirements for where and how to install their heat pumps. These instructions are based on the needs of the model, electrical codes, and common service tasks. We must follow these directions carefully.
Most manuals outline minimum space clearances, suggested room temperatures, and exact installation steps. Ignoring these details can make future service harder and may even void the product warranty. If the manual recommends a minimum height off the floor or wall, we should locate the unit accordingly.
Below is a quick checklist to follow:
- Check safe distance from other appliances
- Ensure access for filter and coil cleaning
- Review wiring and drain pipe layouts
Sticking to the manual during the installation process makes later maintenance straightforward and helps us meet safety rules.
Optimizing Longevity and Reliability
To help our heat pump last longer, we need to protect it from conditions that cause wear, such as moisture and dust. Installing the unit where it stays dry, clean, and cool will reduce breakdowns. Regular maintenance is easier when access is clear, encouraging us to check and clean parts as recommended.
We can boost reliability by:
- Choosing non-damp locations, away from water heaters or laundry machines
- Avoiding direct sunlight or freezing spots
- Installing where filters and panels can be removed easily
Good planning pays off by reducing repair needs and keeping our energy bills lower over time. With easy access and proper care, our heat pump will serve us well for many years.
Compliance and Professional Guidance
Before we install a heat pump, it is important to understand any legal requirements that apply. We also need expert advice and must select the right system for our needs.
Adhering to Local Building Codes and Permits
Every city or town has its own building codes for heat pump installation. These codes ensure safety and efficiency in our homes. We must check if we need permits before doing any work. Sometimes, permits are required for both new installations and replacements.
Ignoring codes and permits can lead to fines or being asked to stop work. Local building departments can answer our questions and provide the right forms. It’s a good idea to keep records of all permits and inspections.
If our area has rules about placement, sound levels, or energy efficiency, we must follow them. This may affect where we place the heat pump, especially air source heat pumps and mini-split systems.
Key Steps:
- Check with officials about required permits.
- Review code requirements for our type of property.
- File for and receive permits before starting work.
Consulting an HVAC Professional
An HVAC professional helps us avoid mistakes and costly problems. They know the best practices for heat pump installation and follow all codes. A trained technician can help select the optimal location and size for our system.
Technicians test our home’s insulation and wiring before starting work. They look for the best spot for airflow and easy access for maintenance. If we install a mini-split or split heat pump, an expert finds the right outdoor and indoor placements.
Professionals also make sure our system works at peak efficiency. They often handle permits and code compliance, saving us time and trouble. We should always ask if our contractor is licensed and insured.
Why consult a pro?
- Ensures safe, legal installation
- Helps with permit paperwork
- Finds the best placement for comfort and efficiency
Selecting the Right Heat Pump Type
Choosing the right heat pump is about comfort, savings, and performance. We should consider our climate, budget, and the size of our home. Air-source heat pumps are the most common and work well in many areas. Split systems and mini-split heat pumps are great for homes without ductwork.
If our house has unique heating or cooling needs, some models work better than others. For example, mini-split systems allow for room-by-room control. Large homes may need a bigger or multi-zone system.
It is important to balance costs, heat output, and energy use. An HVAC professional can help us compare all the options and choose the one that fits our needs best.
| Heat Pump Type | Ideal For | Duct Required | Main Benefit |
|---|---|---|---|
| Air-Source | Most homes/climates | Yes | Energy savings |
| Split Heat Pump | Larger/older homes | Yes | Whole-home solution |
| Mini-Split | Rooms/add-ons, no ducts | No | Flexible installation |